Medical Disclaimer: The information provided on this website is for informational and educational purposes only and is not intended as personal medical or health advice. The content, including text, graphics, and images, is not a substitute for professional medical advice, diagnosis, or treatment. Always seek the advice of your physician or other qualified healthcare provider with any questions you may have regarding a medical condition or before starting any new exercise, nutrition, or supplement program. Never disregard professional medical advice or delay in seeking it because of something you have read on this blog. Reliance on any information provided by this site is solely at your own risk.
Multi-Use Gear, Floor Mapping, and Budget Priorities
How to Choose Resistance Training Equipment for Small Gyms can feel overwhelming. Here’s a simple, proven way to pick the right pieces and set them up.
Direct answer: Choose multi‑use gear first, map your floor, match loads to members, then add accessories within budget.
You’ll learn a floor‑space audit, priority gear list, layout templates, and a progression that supports beginners through advanced lifters—plus safety, recovery, and tracking tips.
Why Versatile Equipment Drives Better Training Results
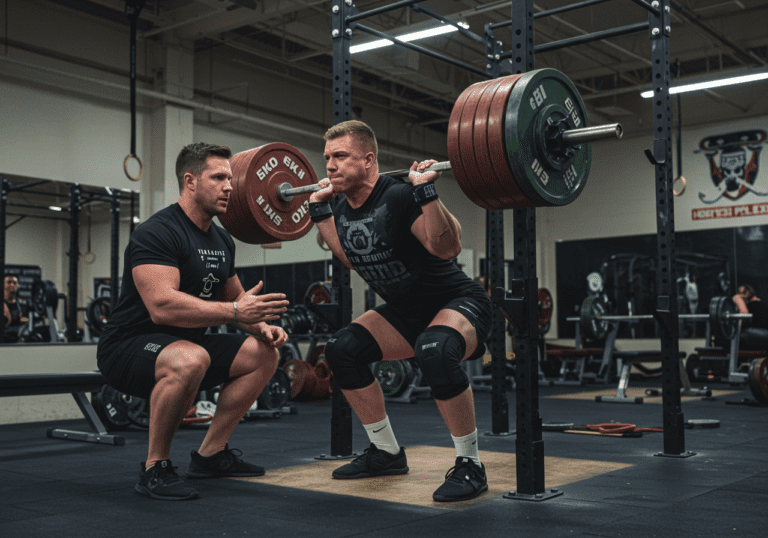
Small gyms win by delivering complete training with minimal clutter. The right tools let you train the big patterns—squat, hinge, push, pull, carry—across ability levels. Multi‑use equipment increases exercise variety and reduces wait times, which improves adherence.
From a physiology standpoint, progressive mechanical tension drives strength and muscle gains. When equipment covers a broad load range and supports incremental jumps (e.g., micro plates or adjustable dumbbells), lifters can progress steadily without overreaching.
In practice, micro‑gyms that prioritize compact, versatile pieces maintain smoother traffic flow and fewer bottlenecks. When members can train without long delays, they complete more quality sets—often translating to better results over time, assuming adequate recovery and nutrition.
Four-Step Process: Audit, Define, Budget, and Equip
Step 1 — Audit the space (20–30 minutes): Measure usable floor area, ceiling height, doorway widths, and power outlets. Note wall studs for storage. Identify noise/neighbor constraints if in a shared building.
Step 2 — Define member needs: Estimate the mix of beginners, intermediates, and advanced lifters. List required patterns (squat, hinge, push, pull, carry, core) and special needs (e.g., rehab‑friendly options, low‑impact choices).
Step 3 — Set a realistic budget and timeline: Separate must‑haves from nice‑to‑haves. Plan for flooring and storage first, then primary strength tools, then accessories. Leave ~10% for maintenance or replacements.
Step 5 — Layout zones: Create a rack zone, free‑weight zone, cable/band zone, and a mobility strip. Aim for clear walkways and sightlines for coaching.
Step 6 — Safety & compliance: Bolt stands if needed, anchor racks, protect walls, and post load limits. Keep a maintenance log (pins, cables, bolts).
Quick comparison of compact strength tools (plain‑text table):
~200 sq ft: Half rack with pull‑up bar, one adjustable bench, adjustable dumbbells, trap bar, a few kettlebell pairs, single cable column if budget allows, wall storage.
Session flow template (works for 1–4 people): Warm‑up (Zone 2 heart rate, 5–8 min), Power/skill (jumps or light tech work), Strength A (rack or dumbbells), Strength B (cable or KB), Accessory/core, Short finisher (optional), Cooldown/mobility.
Real session example (30–45 minutes): I monitor warm‑ups in Zone 2 with a Garmin. A: Trap‑bar deadlift 3×5 @ RPE 7. B: Cable row 3×8. C: Dumbbell bench 3×8. Carry finisher: KB suitcase carry 4×20 m. Cooldown: breathing + hip openers. I log loads in Strong and nutrition in MyFitnessPal to ensure adequate protein and total calories.
Client note: “I thought I needed five machines. With a rack, adjustable dumbbells, and one cable column, I hit everything without crowding.”
12-Week Progression from Beginner to Advanced Readiness
Member programming growth (12 weeks):
Weeks 1–4 (Beginner): 2–3 sessions/week. Full‑body circuits. Main lifts 3×8 @ RPE 6–7. Prioritize technique, tempo control, and consistent warm‑ups. Use dumbbells or trap bar if barbell is new.
Weeks 5–8 (Intermediate): 3 sessions/week. Add a second set across main lifts or shift to 4×6 @ RPE 7–8. Introduce heavier hinge/squat on alternating days. Keep one lower‑impact day using cable and KB work.
Weeks 9–12 (Advanced readiness): 3–4 sessions/week. Periodize intensities (one heavier day @ RPE 8–9, one moderate volume day @ RPE 7, one technique/recovery day @ RPE 6). Consider micro plates or cable micro‑progressions.
Equipment add‑on roadmap (as budget allows): Start with flooring + storage → half rack or adjustable dumbbells + bench → single cable column → landmine + suspension straps → specialty bar or dual cable column. This path balances versatility and member throughput before luxury pieces.
Capacity scaling: For small groups, rotate stations: Rack work, cable pulls, KB carries. Use synchronized timers to prevent bottlenecks. Track session RPE and set completion in a shared sheet.
Progress checks: Every 4 weeks, test a rep PR at moderate RPE (e.g., best 8‑rep set) or add a small load bump. Track three KPIs: session count/month, average RPE on main lifts, and movement quality notes (video review on a phone works).
Frequency Guidelines, Plateau Fixes, and Injury Prevention
Frequency & intensity: Most members do well with 2–4 strength sessions/week. Start conservative: leave 2–3 reps in reserve on most sets. Schedule a lighter week every 4–8 weeks.
Troubleshooting plateaus: Adjust only one variable at a time: volume, load, or frequency. Swap a variation (e.g., goblet to front squat) if technique stalls. Use cable micro‑progressions when plates jump too big.
Overtraining & motivation: Watch trends: rising resting heart rate, poor sleep, irritability, declining bar speed. Reduce volume 20–30% for a week and add easy Zone 2 cardio or mobility sessions. Short, winnable workouts keep consistency high.
Injury safeguards: Clear walkways, use spotter arms, check pins/bolts weekly, retire frayed bands, and label max loads. Teach bracing and hinge mechanics early. Keep a first‑aid kit and incident log.
Recovery & nutrition: Aim for protein around 1.6–2.2 g/kg/day, plenty of fruits/veg, and adequate carbs on training days. Hydrate and target 7–9 hours of sleep. I track intake in MyFitnessPal and nudge calories based on bodyweight trends rather than day‑to‑day swings.
Validation signals: In practice, small gyms using a rack‑plus‑cables core can handle steady member flow with fewer bottlenecks. Clients often report smoother sessions and clearer progress logs—consistent with what coaching experience and peer‑reviewed guidance would predict.
Next steps: Start with the audit, lock your essentials, and pilot the 12‑week progression. If you want my floor‑plan checklist and sample shopping list.
Medical Disclaimer: The information provided on this website is for informational and educational purposes only and is not intended as personal medical or health advice. The content, including text, graphics, and images, is not a substitute for professional medical advice, diagnosis, or treatment. Always seek the advice of your physician or other qualified healthcare provider…
Medical Disclaimer: The information provided on this website is for informational and educational purposes only and is not intended as personal medical or health advice. The content, including text, graphics, and images, is not a substitute for professional medical advice, diagnosis, or treatment. Always seek the advice of your physician or other qualified healthcare provider…
Medical Disclaimer: The information provided on this website is for informational and educational purposes only and is not intended as personal medical or health advice. The content, including text, graphics, and images, is not a substitute for professional medical advice, diagnosis, or treatment. Always seek the advice of your physician or other qualified healthcare provider…
Medical Disclaimer: The information provided on this website is for informational and educational purposes only and is not intended as personal medical or health advice. The content, including text, graphics, and images, is not a substitute for professional medical advice, diagnosis, or treatment. Always seek the advice of your physician or other qualified healthcare provider…
Medical Disclaimer: The information provided on this website is for informational and educational purposes only and is not intended as personal medical or health advice. The content, including text, graphics, and images, is not a substitute for professional medical advice, diagnosis, or treatment. Always seek the advice of your physician or other qualified healthcare provider…
Medical Disclaimer: The information provided on this website is for informational and educational purposes only and is not intended as personal medical or health advice. The content, including text, graphics, and images, is not a substitute for professional medical advice, diagnosis, or treatment. Always seek the advice of your physician or other qualified healthcare provider…