Choose exercises that fit your body’s actual ranges
Mobility assessments help you choose the right exercises, loads, and warm-ups so training fits your body instead of forcing it. Today you’ll learn simple tests and how to apply them.
Direct answer: Mobility assessments reveal joint limits and control so you can adjust exercise selection, loading, and volume to progress safely and consistently.
Controlled ranges build strength and reduce injury risk
Your joints are only as strong as the ranges you can control. Assessments expose where you’re stiff, weak, or asymmetrical. With that clarity, you can slot the right mobility drills before strength work, tweak angles (like heel-elevated squats for tight ankles), and set smarter progressions.
Physiology in simple terms: Muscles guard when joints feel unstable or restricted. Graded exposure—mobility work plus strength—teaches tissues to tolerate load in new ranges. In practice studies and coaching labs, screens tied to targeted prep often reduce pain flares and improve technique quality, which supports better performance.
Client note: “Two weeks after fixing my ankle range, my squat felt natural and my knee stopped nagging,” Mia told me. We also saw steadier bar speed on her app’s velocity tracker—likely from cleaner mechanics.
My early mistake was guessing. I stretched hamstrings daily, yet my deadlift stayed sticky. A five-minute straight-leg raise test showed neural tension and hip strategy issues, not true hamstring length. Changing prep solved it.
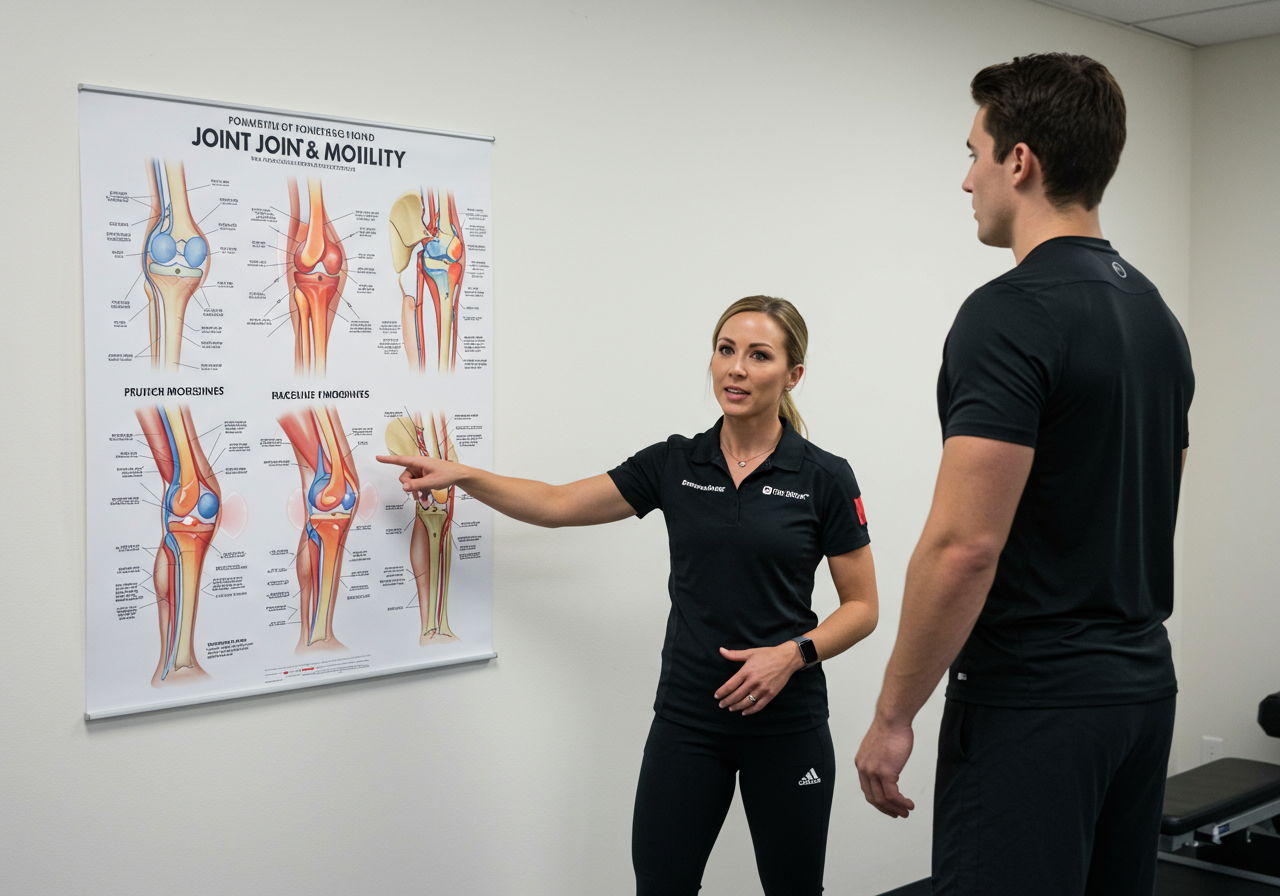
Test ankle, squat, shoulder, and hip mobility
Set up (3 minutes):
Safety first: clear space, warm 5 minutes (easy bike or brisk walk), and skip tests that aggravate pain. If unsure, complete a PAR-Q with a pro.
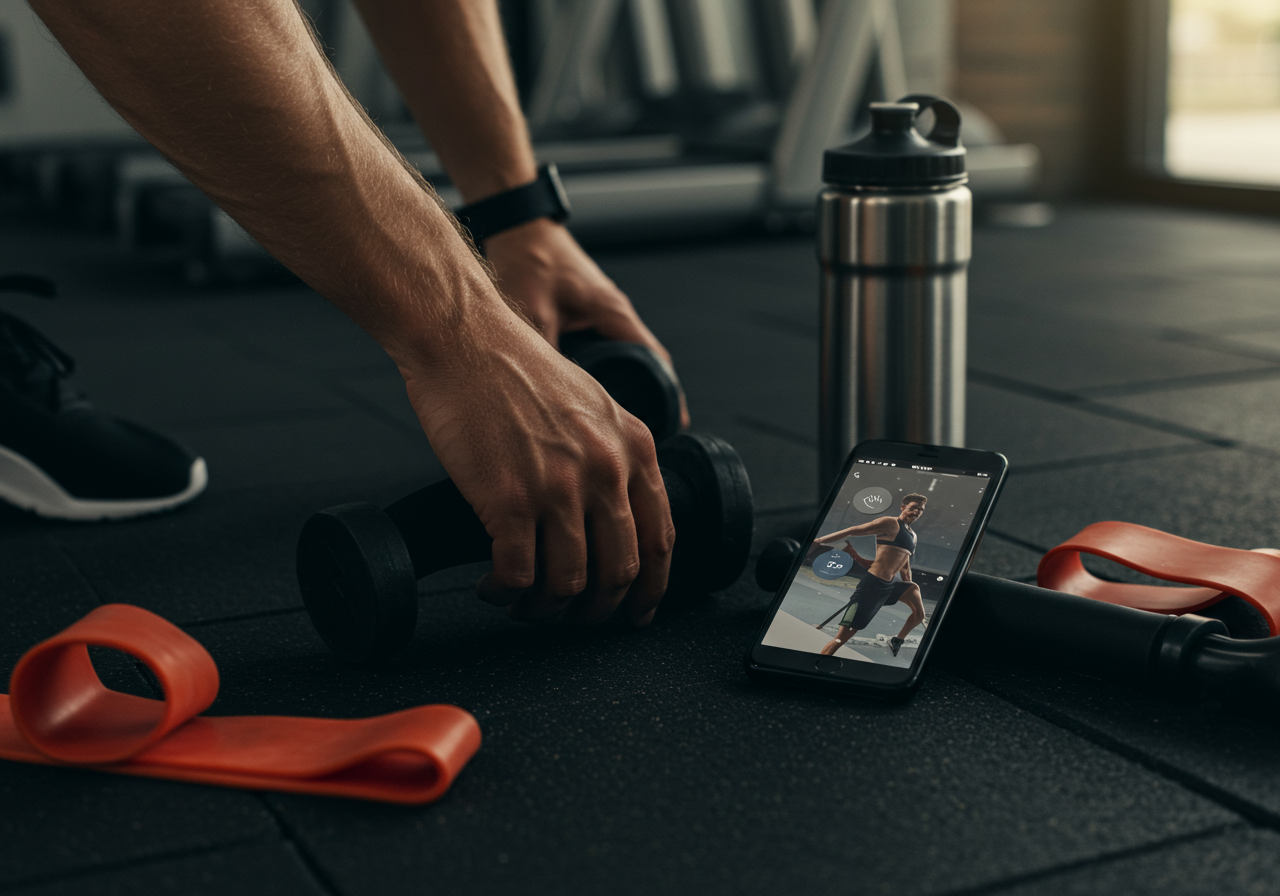
Tools: wall, dowel/broom, tape measure, phone camera at hip height, and a notepad or app (Google Sheets, TrueCoach, or Notes).
Core mobility assessments (8–12 minutes total):
Ankle dorsiflexion — knee-to-wall: Barefoot, big toe 10 cm from wall. Drive knee to touch wall without heel lift. Measure max distance. Aim for ~8–12 cm each side. If one side lags, note it.
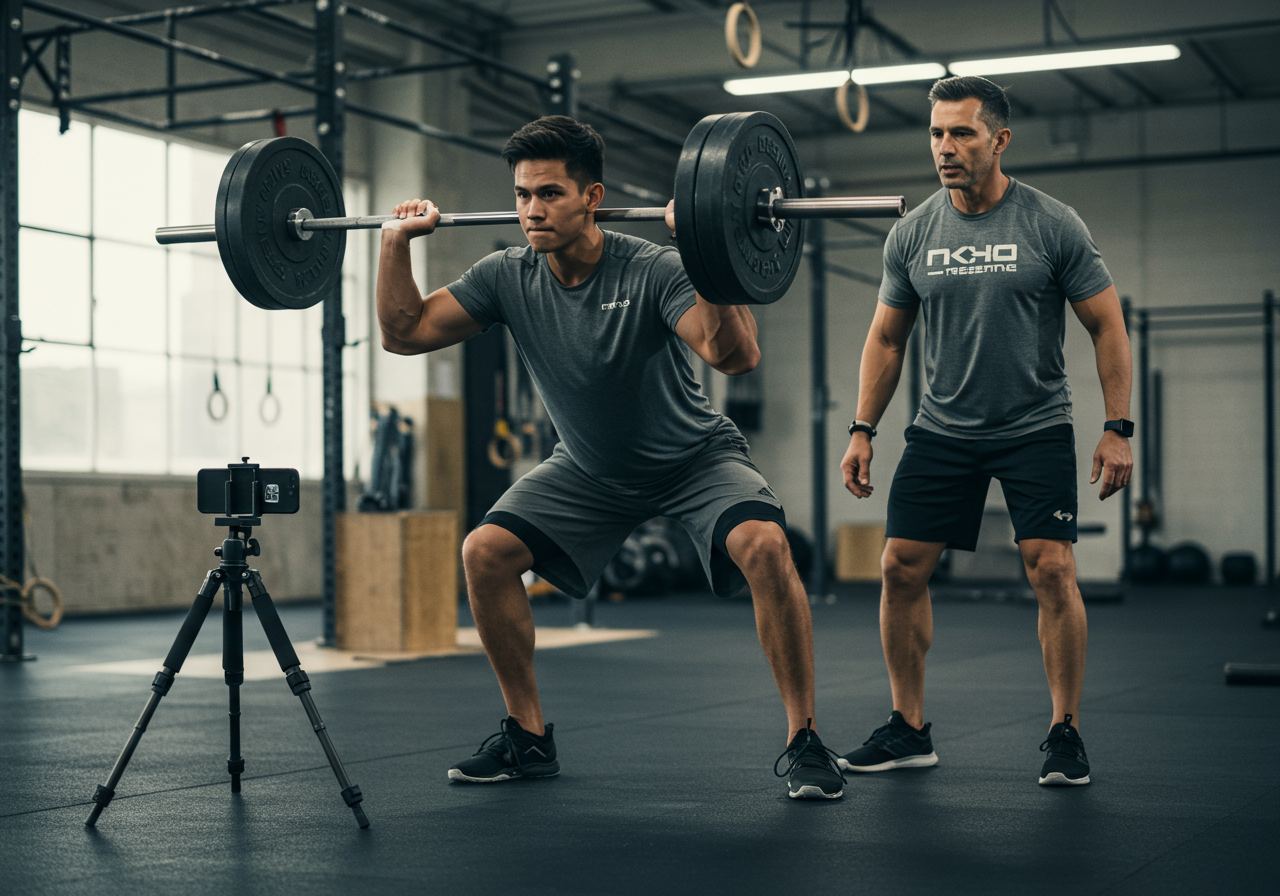
Overhead squat screen: Feet shoulder width, dowel overhead, squat as deep as comfortable. Watch heels (stay down), knees (track over toes), pelvis (no aggressive tuck), and arms (stay by ears). Record from front and side.
Active straight-leg raise: Lie on back, one leg straight up, other flat. Raise to tension without pelvis tilt. Rough target: heel above mid-thigh of the down leg. Compare sides.
Hip flexor (Thomas) quick check: Sit on bench, hug one knee, roll back. Does the hanging thigh reach parallel without arching? If it floats high, hip flexors need love.
Shoulder Apley reach: One hand over, one under. See finger distance between hands behind back. Compare sides. Note discomfort or pinch.
Thoracic wall slide: Back to wall, lower ribs down, forearms on wall. Slide arms up without ribs flaring. If ribs pop or wrists peel off, thoracic or scapular control is limited.
Score quickly with a traffic-light system: Green = good control/no pain; Amber = mild restriction/asymmetry; Red = pain or clear limitation. Choose drills accordingly.
Cheat sheet—how each test informs programming:
Ankle knee-to-wall → If limited, heel-elevate squats, split squats; calf/soleus stretches between sets.

Overhead squat → If heels lift, add ankle work; if torso collapses, add thoracic and core bracing drills.

Straight-leg raise → If limited, nerve glides and hamstring eccentrics; hinge patterns with reduced range.

Hip flexor check → If tight, hip flexor openers and glute activation; front-foot elevated split squats.

Apley reach → If restricted, scapular CARs, posterior cuff work; adjust pressing angle to pain-free range.

Thoracic wall slide → If limited, foam-roll T-spine and wall slide drills; prioritize goblet/front squat over back squat.
Apply it in a session (example 45–60 min):
Warm-up (8 min): pick 2–3 drills from your Amber/Red list (e.g., knee-to-wall x 2 sets, wall slides x 2 sets).
Strength (30–35 min): 2 main lifts in ranges you own (e.g., goblet squat and one-arm row) at RPE 6–8.
Conditioning (10–15 min): zone 2–3 bike or brisk hills, nasal breathing most of the time.
Finisher: 1 corrective you want to “own” tomorrow (30–60 seconds of controlled movement).
Track it: Log left/right scores, color codes, and notes in Sheets. I also tag videos on my phone by date and test (e.g., “2026-01-18_ankle-L”).
Testimonial — Jordan, busy parent: “Five-minute screens made workouts less random. My shoulder stopped barking once I swapped flat bench for incline and added wall slides.”
Progress from daily drills to maintenance patterns
Level 1 — Beginner (Weeks 1–4):
Frequency: 3 days/week. Each day: 8–10 minutes of targeted mobility from your Amber/Red list.
Strength: 2 main patterns/day (squat or hinge, push or pull) 3×8–10 at RPE 6–7. Tempo 2–1–2.
Cardio: 2×20 minutes zone 2 (can talk in sentences). Walk or cycle.
Re-assess key tests every 2 weeks; adjust drills based on changes.
Level 2 — Intermediate (Weeks 5–8):
Mobility: Keep the 1–2 biggest limiters daily (5–6 minutes). Others shift to maintenance (3×/week).
Strength: 1 heavier day (3×5–6 at RPE 7–8) and 1 volume day (3×10–12 at RPE 6–7). If ankle range improved, reduce heel lift or increase squat depth by a notch.
Cardio: add 1 short interval set weekly (6×60 seconds steady-hard, 60 seconds easy) if your screens are Green for joints stressed by your intervals.
Level 3 — Advanced (Weeks 9–12):
Mobility: Short, potent blocks (2 drills, 90 seconds each) tailored to the day’s lifts.
Strength: Alternate intensity (RPE 8–9 in safe ranges) with power work (lighter, fast intent). Introduce front squats or trap-bar deadlifts if overhead squat pattern is Green/Amber improving.
Conditioning: 1 longer zone 2 (30–45 min) + 1 interval day or hill sprints only if ankles/hips pass tests and no pain.
Deload & Re‑screen (Week 13 or after any 8–10 hard weeks): reduce volume by ~30–40%, keep movement quality high, re-test all screens, and rewrite your warm-ups based on the newest Amber/Red items.
My training log example: Last winter my left ankle knee-to-wall improved from 7 cm to ~10 cm in 6 weeks. I lowered my heel wedge, gained 3–4 cm of squat depth, and my knees felt calmer on split squats. Correlation isn’t proof, but footage confirmed cleaner patterns.
Client outcome in practice: After shoulder Apley improved from “fingertips apart” to “overlap,” Sam swapped flat bench for neutral-grip dumbbell press and added thoracic work. Four weeks later, he pressed the same load with smoother reps and reported no night ache. We can’t claim causation, yet the sequence aligned with his symptom drop.
Re-test every two weeks and adjust intensity
Frequency: Keep 5–10 minutes of targeted mobility in every session. If time-crunched, do it between strength sets.
Intensity: Lift mostly at RPE 6–8. Save RPE 9 for movements that are Green and technically repeatable.
Common mistakes: Skipping re-tests, chasing extreme ranges, and adding new exercises without removing old ones. Keep the toolbox small and precise.
Troubleshooting plateaus: If a test stalls for 2+ weeks, change the drill angle (e.g., bent-knee calf work for soleus) or move dose to daily micro-sessions.
Overtraining signals: Sleep disruption, morning soreness that lingers, HRV drop if you track it (Whoop, Oura, Garmin). If seen, hold volume steady for a week.
Injury flags: Pain that sharpens or radiates—stop and regress. Swap painful ranges for pain-free angles and seek a qualified clinician when needed.
Recovery basics: Sleep 7–9 hours; protein 1.6–2.2 g/kg; eat enough carbs around training; hydrate with a pinch of salt if you sweat heavily. Some athletes find collagen + vitamin C 30–60 minutes pre-tendon loading useful; discuss with a professional first.
Progress tracking: Color-code tests, keep RPE notes, and tag videos monthly. I like Strava for cardio zones and MyFitnessPal for quick protein checks.
Motivation: Tie drills to lifts. Example: “Two sets of knee-to-wall unlocks deeper squats today.” Quick wins beat vague goals.
Next steps: Run the six core tests this week, tag your top two limiters, and rebuild your warm-up around them. Re-test in 14 days and update one training variable. Want my editable checklist? Subscribe and I’ll send the template I use with new clients.
Balance Strength and Cardio with Smart Weekly Structure To combine strength lifts with endurance, start with a simple 3+2 weekly template that balances intensity and recovery. Do two strength days, two endurance days, and one mixed day while keeping easy volume high and hard efforts brief. In minutes, you will learn a clear weekly layout,…
Fast Start Deload weeks convert hard training into reliable progress by lowering fatigue while keeping your movement sharp. In this guide, you’ll learn when to schedule them, how much to cut, and simple templates that protect strength and joints. Plan deload weeks by reducing volume 30–50%, keeping technique sharp, and maintaining intensity around RPE 6–7…
Anti-inflammatory foods can meaningfully reduce soreness and speed up recovery when paired with smart training, adequate protein, and sleep. In this guide, I merge a simple training week (strength, cardio, and mobility) with recovery nutrition that lowers unnecessary inflammation. You’ll get meal templates, grocery picks, supplement considerations, and a step-by-step plan to progress from beginner…
Build Athletic Range With Yoga-Based Mobility Training Yoga-based mobility improves athletic performance by building usable range, end-range control, and calm breathing under pressure. Today you’ll learn how to plug it into strength, cardio, and sport practice without losing time or power. Direct answer: Do 10–20 minutes of targeted flows before or after training, three to…
5K to 10K is achievable with a simple, repeatable system that grows your aerobic base and resilience. To move from 5K to 10K, extend your long run 0.5–1 mile weekly and keep most mileage easy in Zone 2. In the next few minutes, you’ll get a coach-tested framework: weekly structure, milestone checkpoints, beginner-to-advanced progressions, fueling…
Hook & Quick Overview Shoulder Mobility Drills to Prevent Impingement and Pain matter because tight tissues and weak stabilizers make overhead movement cranky fast. This guide gives you a proven, beginner-friendly system. Direct answer: Practice 8–12 minutes of targeted mobility daily and 2 strength sessions weekly to reduce shoulder impingement risk and pain. You will…